- rinse sardines, remove heads and clean out sardines (remove entrails by making a long slit on the underside and scoop/pull out) and rinse again under cold water
note : I left the tails on to easily handle them and also remove them from the jars when ready, feel free to cut off the tails if you prefer
- pat dry and then sprinkle the inside of the sardines with coarse salt
- in an airtight container, spread out 1 cm of coarse salt and lay out a layer of sardines, side by side, completely cover with a thin layer of coarse salt and add another layer of sardines, cover with salt again until done
- place a thin piece of wood or thick cardboard on top of the salt, weigh down with a weight and cover with the lid and place in a cool space for several days
- once a day, pour out the brownish liquid that accumulates on the bottom of the container, this process (depending on the quantity) could last between 5-7 days
- when no more liquid accumulates at the bottom of the container, remove the sardines from the container, brush off the excess salt and rinse the sardines in white vinegar and the juice of 1 lemon and let drain and dry for 15 minutes
note : after cleaning out the sardines and removing the entrails, the sardines will weigh 750-800 grams; after the salt-curing and water loss, the sardines will weigh only 500 grams !
- insert the sardines, tails towards the top in 2 glass jars (I used two 500 ml jars)
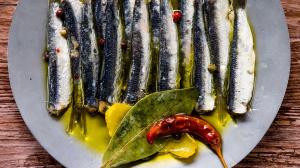
- add 1 bay leaf, 1 dried chili pepper, 2 slices of lemon peel, 10 peppercorns and 1 clove of peeled garlic (optional) in each jar and pour olive oil on top until the sardines are covered but leave a 1 cm space from the top of the jars and close tightly
- place a grate on the bottom of a large pot filled with water, place the sardine-filled jars inside and upside down and heat the water to high to reach a boil, then immediately reduce to a simmer
- simmer the jars of sardines for 30 minutes, then remove closed jars and let cool before storing in the refrigerator, up to approximately 2-3 months (but actually still good after 6 months).
Comments ? Questions ? Send me an email using the contact section below !


